最近在项目中引入了Playwright,这款自动化测试工具现在应该已经名声大噪了。其实早在2020年项目刚开源的时候我就接触到了,它相较于目前最常用的Selenium实在是有太多的优势了,不用为下载各种版本的WebDriver而烦恼,本身就携带网站录制功能,无需下载其他应用,而且背靠微软这么强大的后台,我真的爱不释手,这篇文章主要记录一下我个人使用的一些技巧和踩过的坑
文本不会具体介绍如何使用,这块的教程太多了,就不再赘述了
¶为什么选择Playwright
相较于 Selenium,Playwright 有以下优势:
-
支持多种浏览器和设备:Playwright 支持 Chrome、Firefox 和 Safari 等多种浏览器,也支持 Android 和 iOS 设备,可以在不同的平台上运行测试。
-
更快的测试速度:Playwright 的自动化测试速度比 Selenium 更快,因为它使用了一些优化技术,如异步执行测试用例、缓存页面等。
-
更好的可维护性:Playwright 提供了一些工具和 API,可以帮助开发人员编写更简洁、可读性更高的测试用例,并且可以轻松地维护和更新这些用例。
-
更好的调试功能:Playwright 提供了一些调试工具,可以帮助开发人员快速定位问题,并且可以在测试用例执行过程中进行调试。
-
更好的能力:Selenium基于HTTP协议(单向通讯),Playwright基于Websocket(双向通讯)可自动获取浏览器实际情况。 Playwright为自动等待,而Selenium需要手动设置等待时间,或则监听元素出现
¶centos7部署playwright
我本地使用的是环境是 python3.11和 playwright==1.33.0, 完全没有问题,但我在测试环境部署的时候问题就大了,在测试环境根本执行不了。
通过 cat /etc/*-release 查看我使用的测试环境是CentOS Linux release 7.2.1511 (Core),通过google 发现 playwright在centos上部署官方是不支持的,详情参考 https://github.com/microsoft/playwright/issues/9194

总不能换台机器吧,(其实我是这么想的,但资源有限),最后通过大量踩坑,最终实现了playwright在centos7上的部署
¶安装比较低的版本
1 | pip install playwright==1.16.1 |
¶升级高版本GLIBC
1.下载解压
1 | wget https://ftp.gnu.org/gnu/glibc/glibc-2.18.tar.gz |
2.编译安装
1 | cd glibc-2.18 && mkdir build |
3.验证
1 | [lhop@bj_workspace_vm100007 ~]$ ll /lib64/libc.so.6 |
通过上面两个步骤就可以在centos7部署playwright运行程序了
¶playwright如何绕过反爬
通过使用自动化测试工具打开浏览器和正常打开浏览器会有很多不同的参数配置,因此有些网站会通过 JavaScript去探测这些特征来判断是否在使用自动化测试工具来实现反爬
¶爬虫检测
通过访问 https://bot.sannysoft.com/ 可以显示有哪些特征被检测出
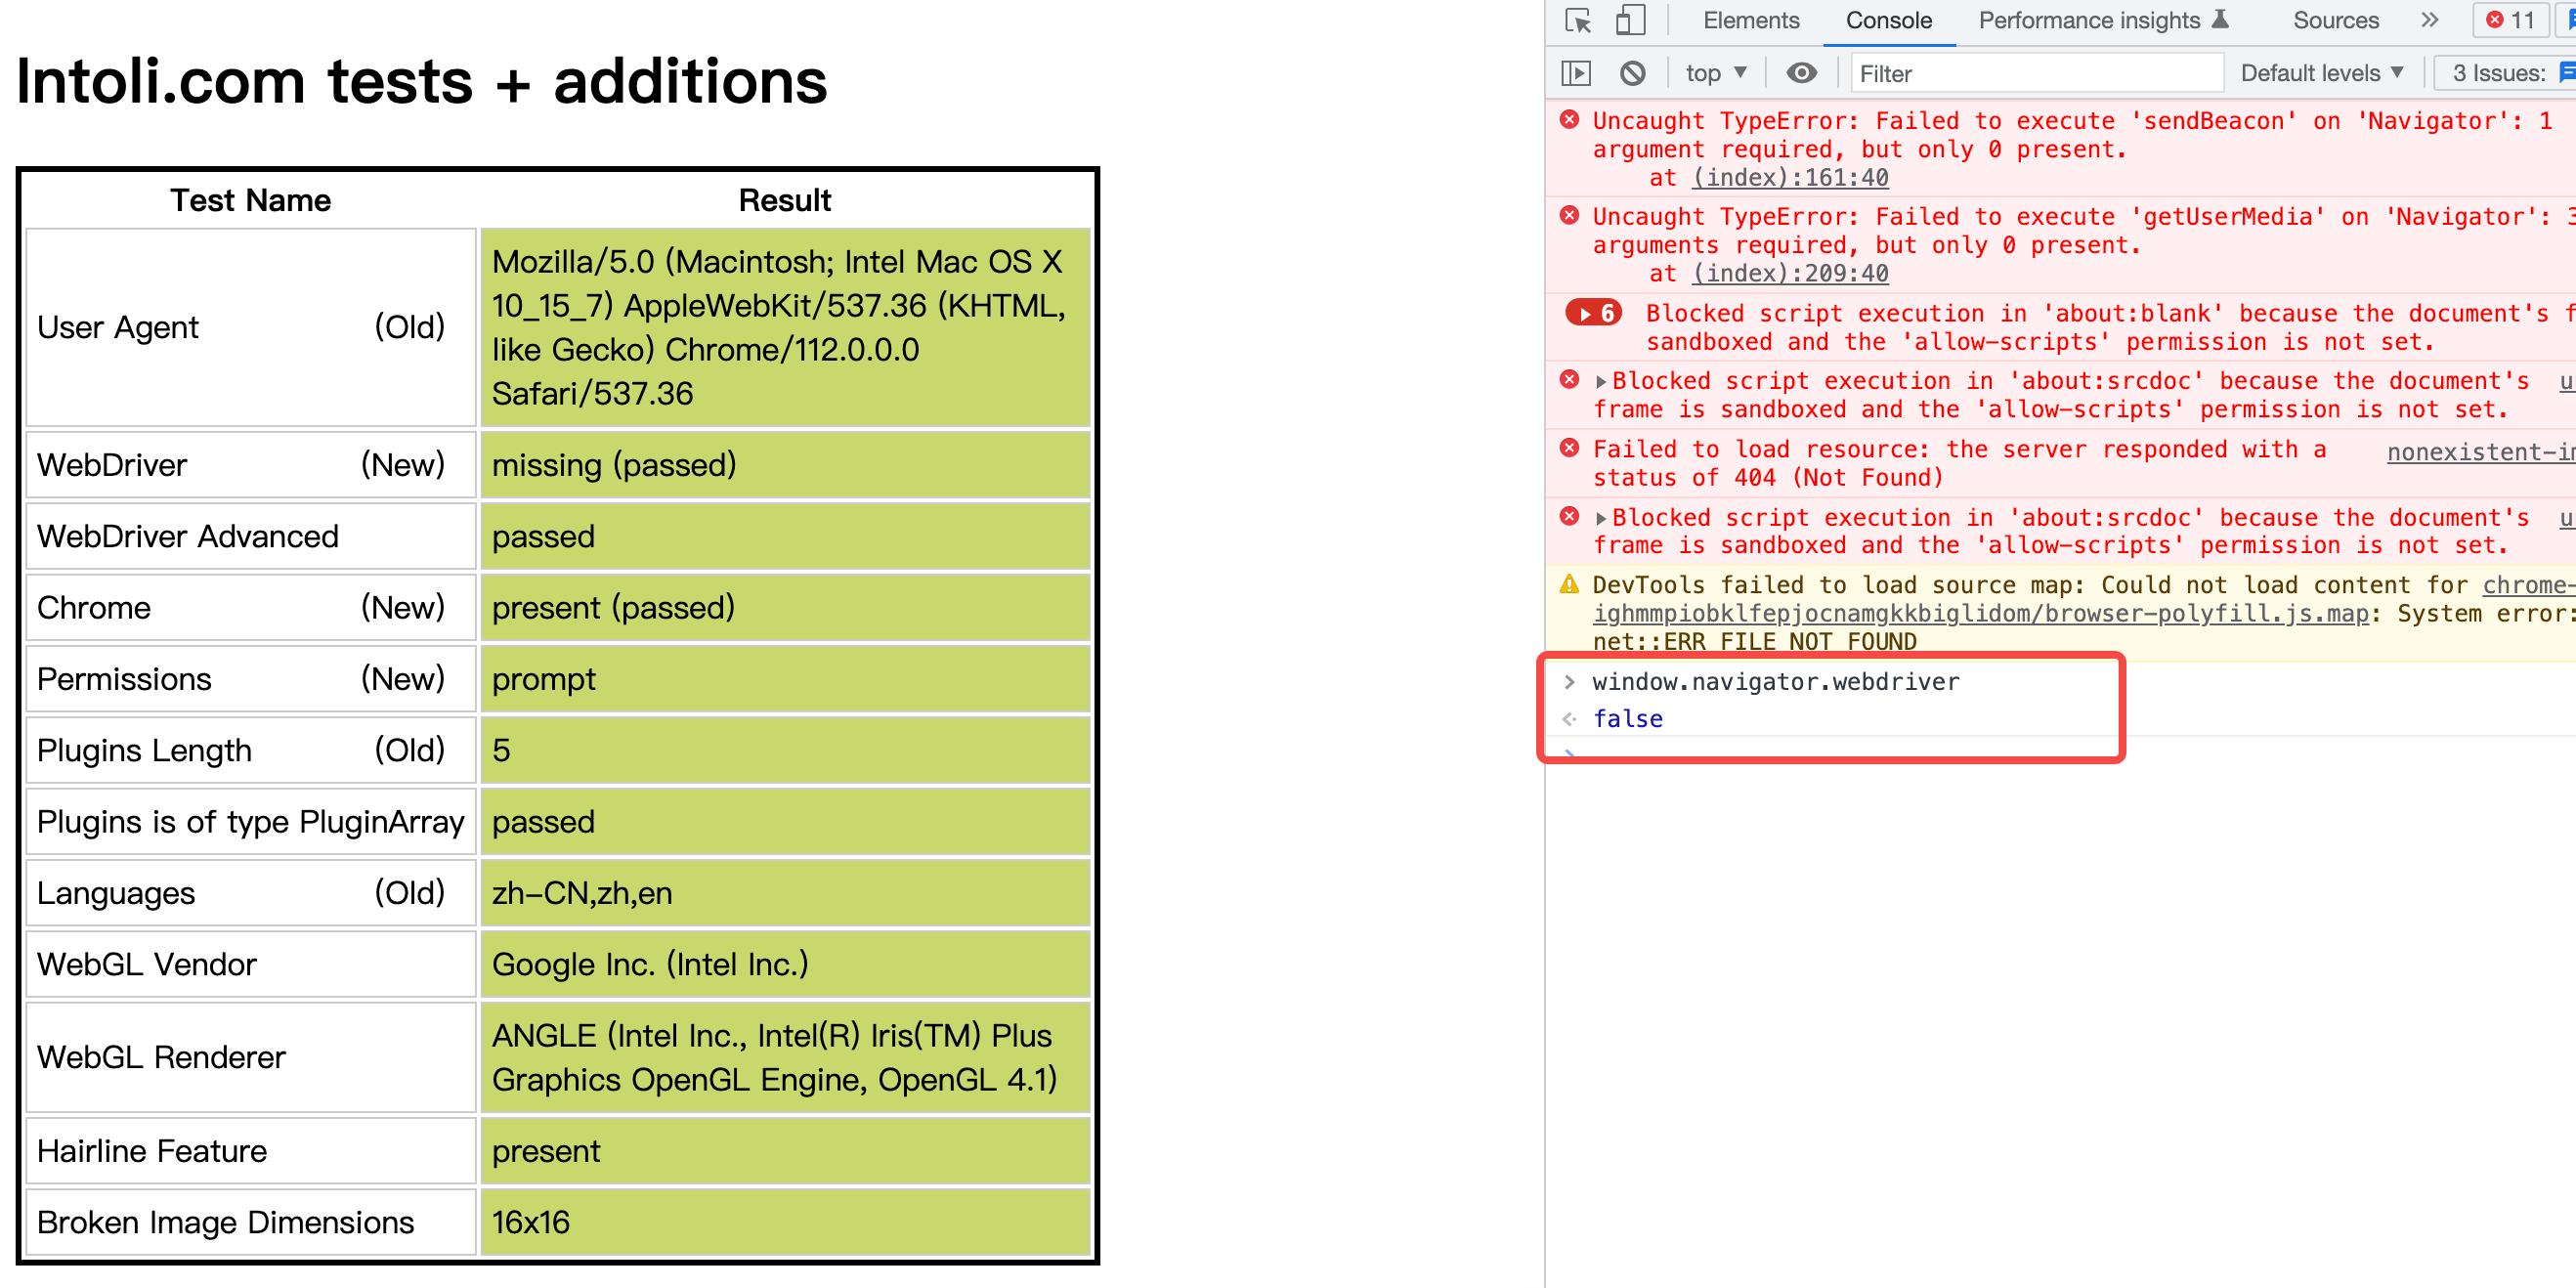
当我正常打开网站时
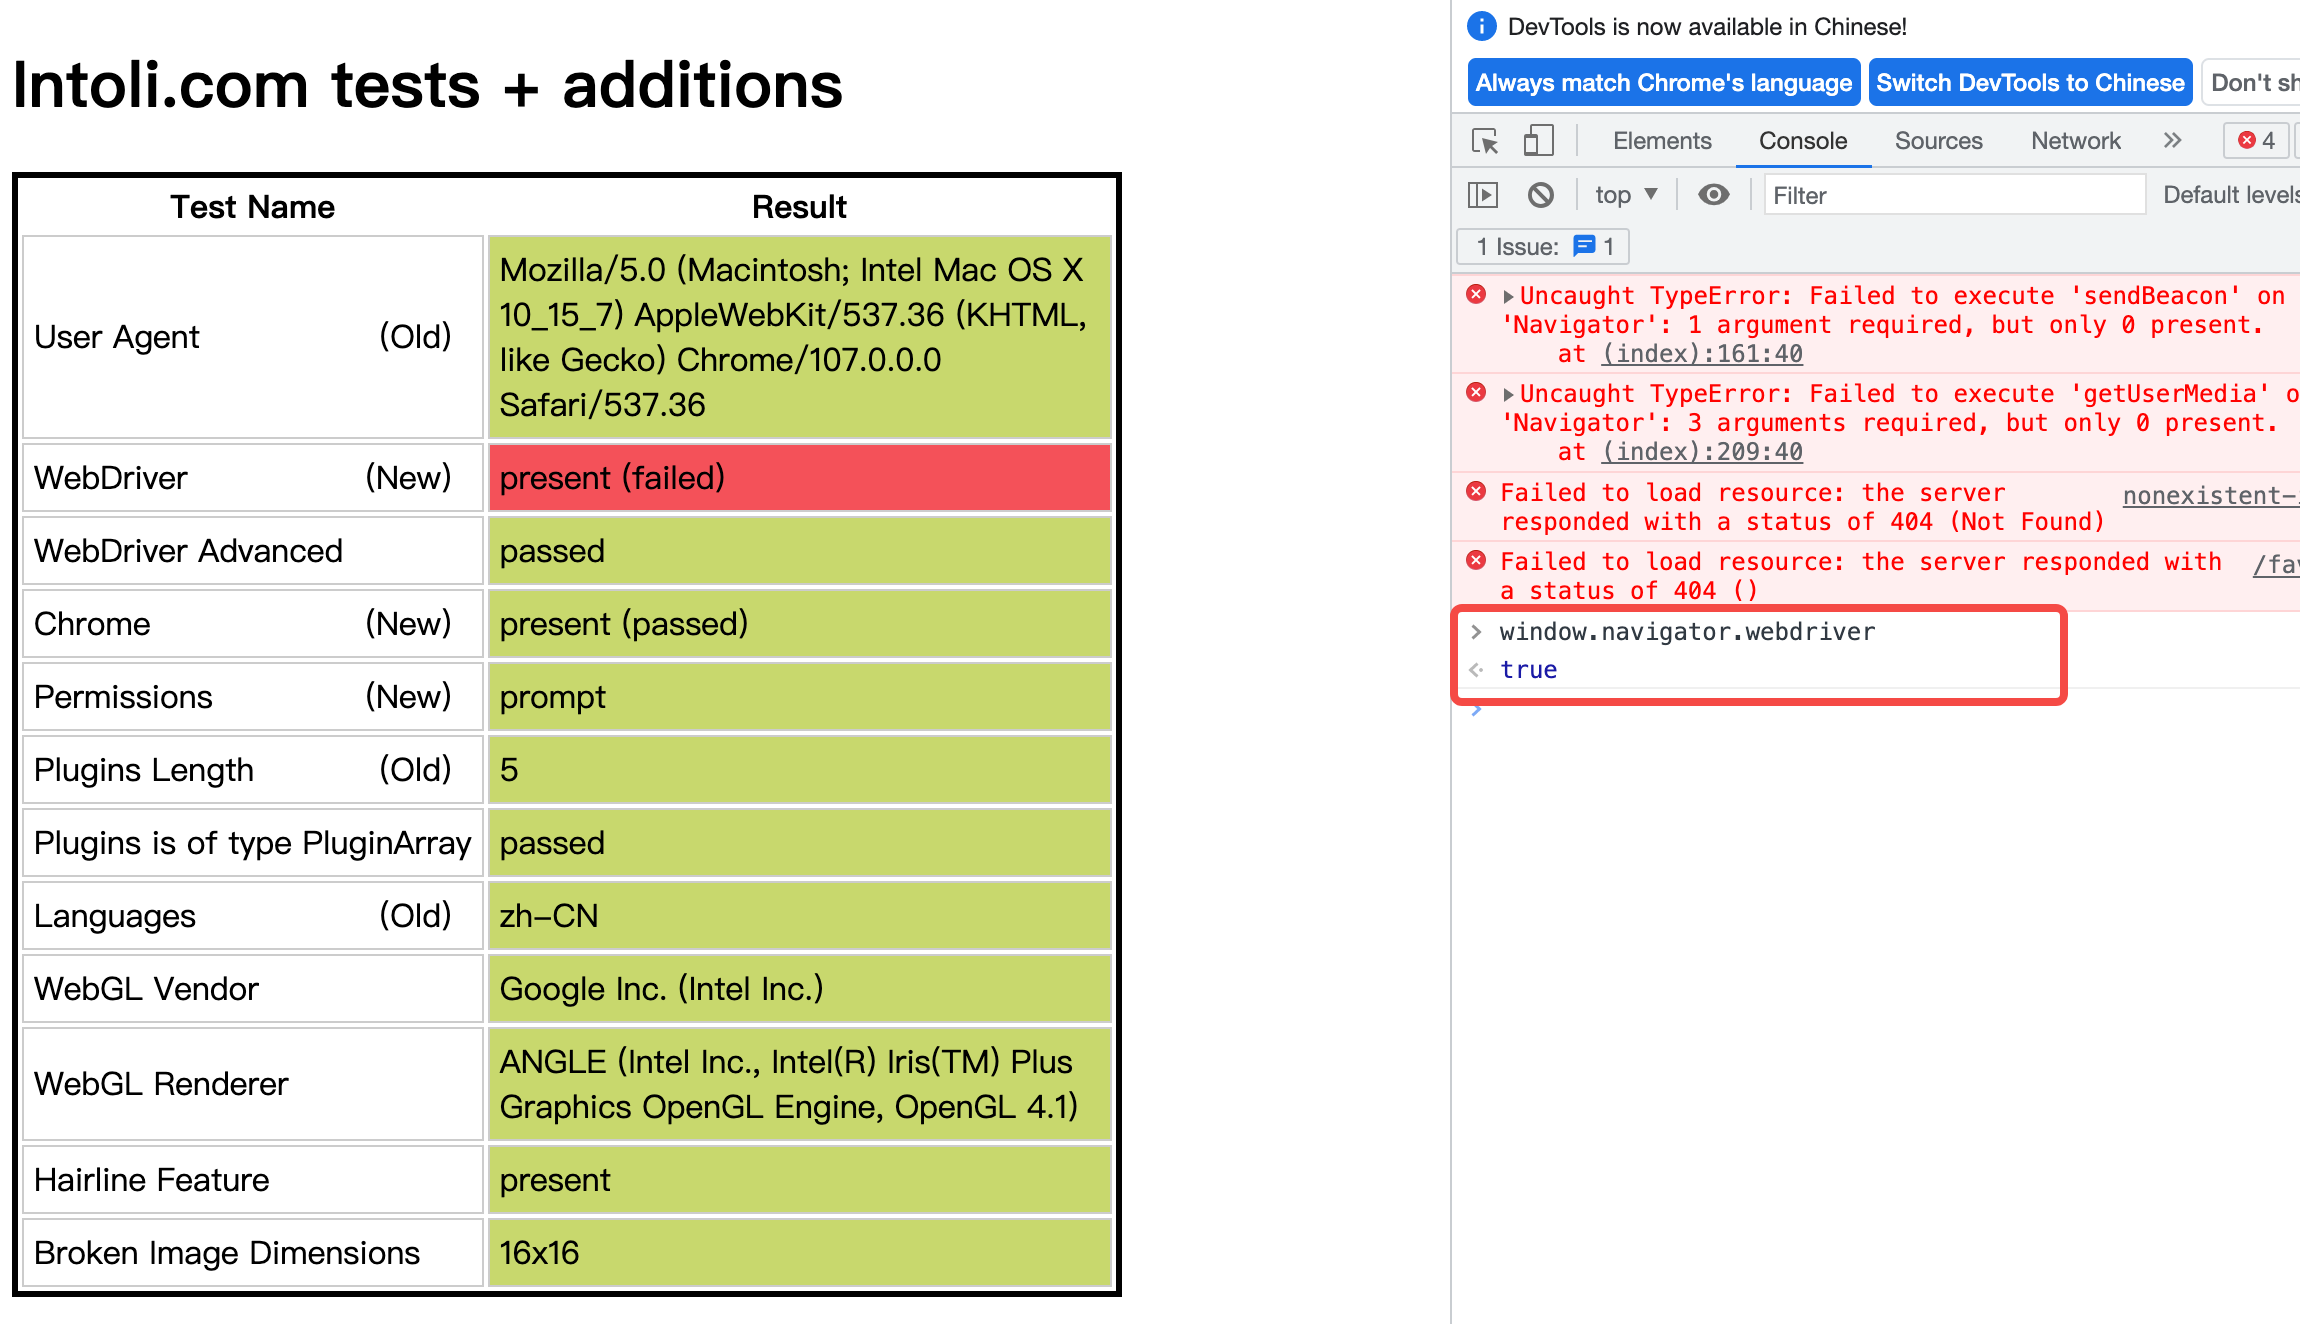
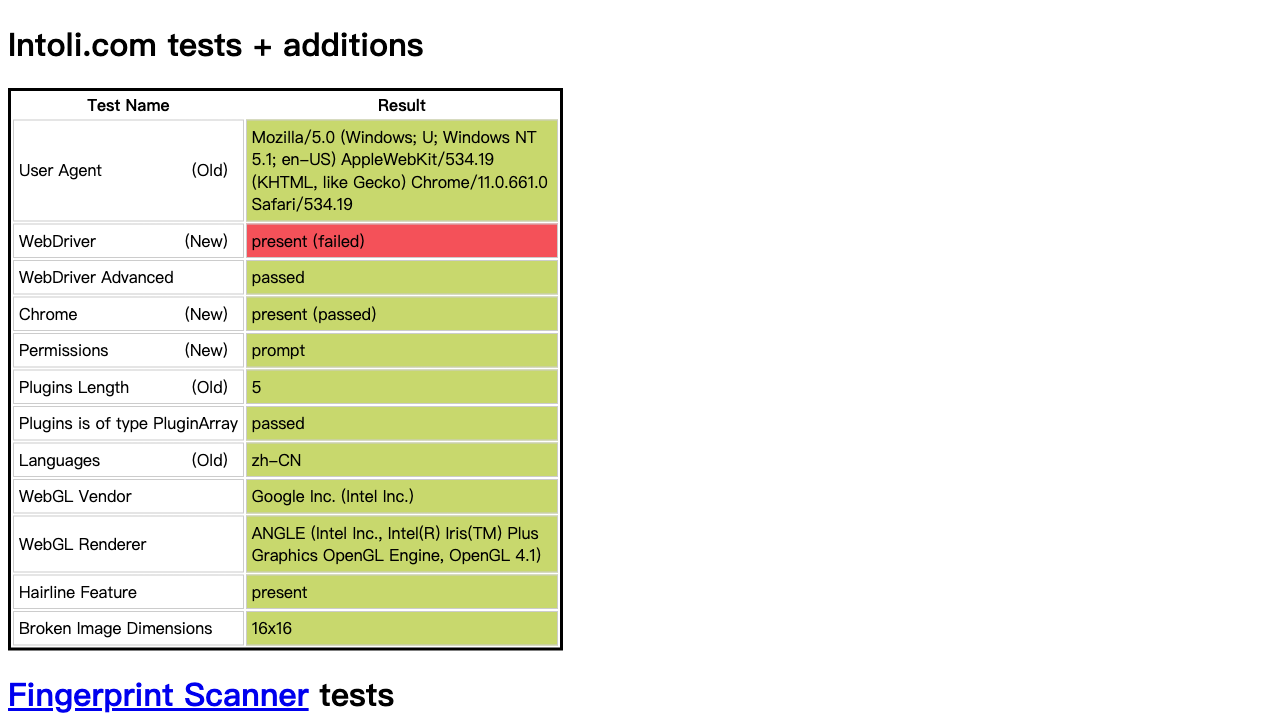
当我使用playwright启动时
¶在linux上执行有头模式
众所周知,在无头模式下的性能显然由于有头模式,但是有没有在项目中出现这种情况,通过有头模式打开网站正常显示而使用无头模式则被判定为爬虫,这应该不在少数。我们看看无头模式下的指标显示
1 | with sync_playwright() as pw: |
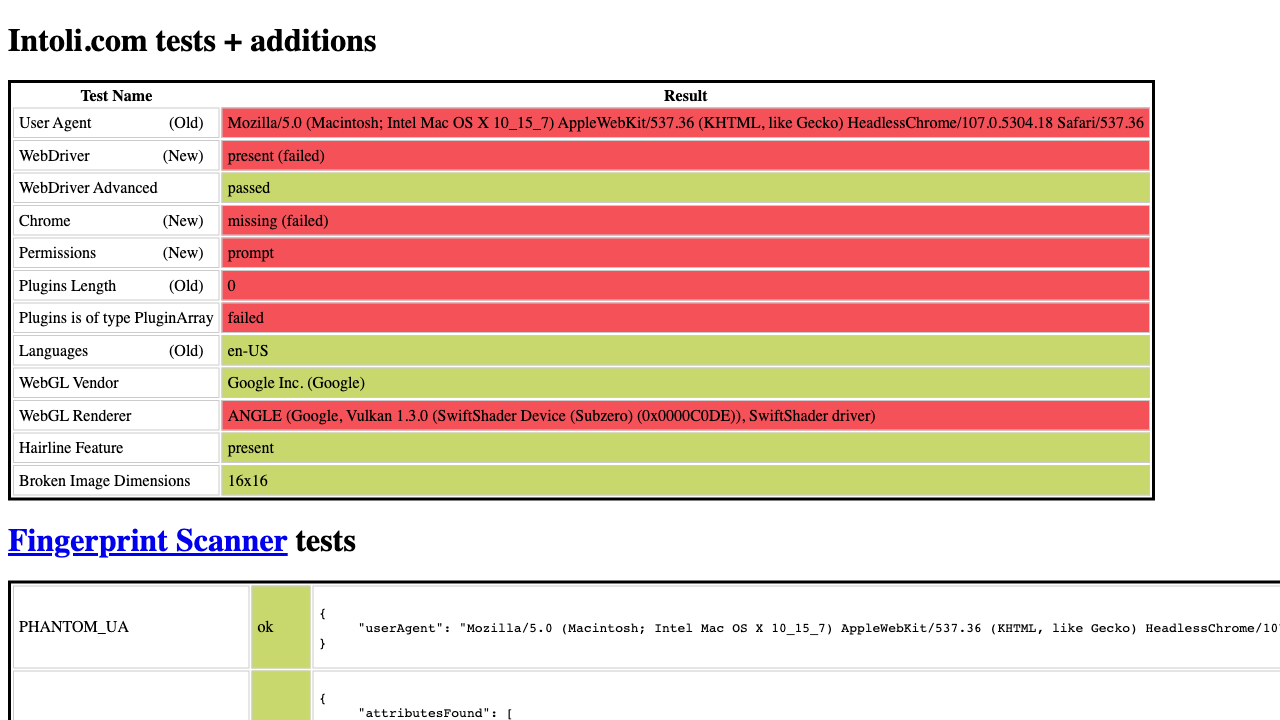
简直没法看😅,那我们将参数设置headless=False再运行一下看看,
1 | playwright._impl._api_types.Error: |
在linux上执行有头模式好像并不支持呢,有没有办法解决呢
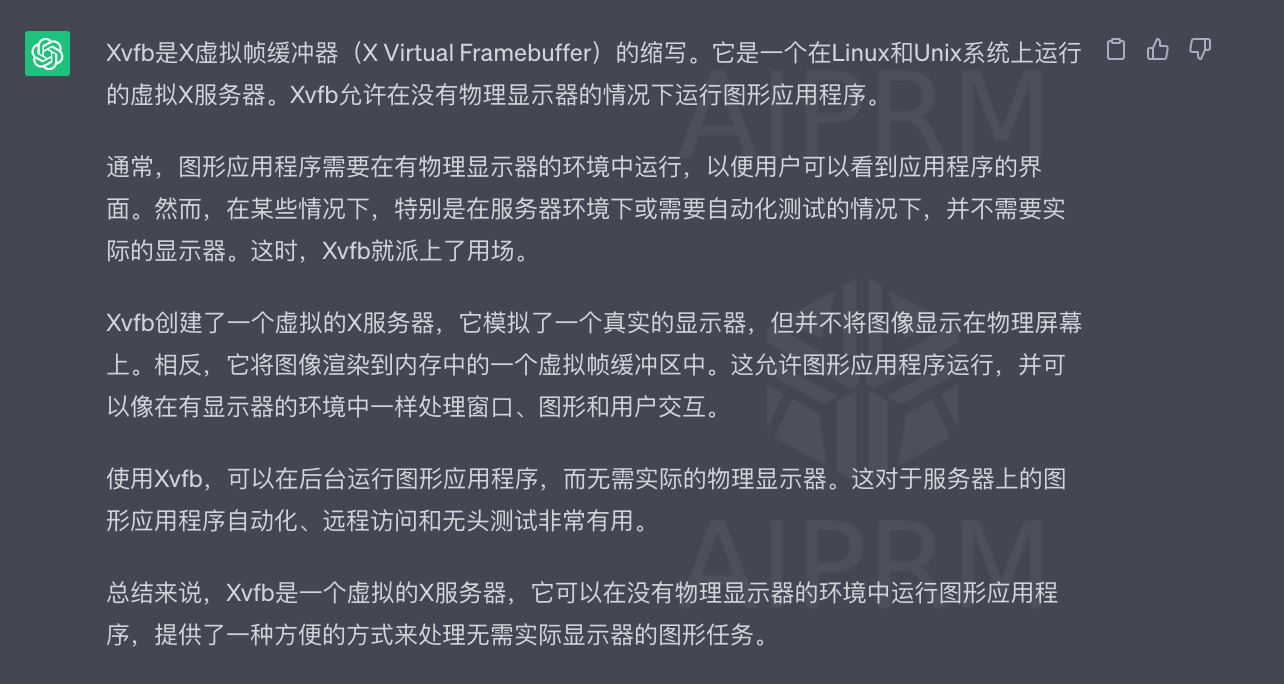
¶Xvfb
通过google 翻阅到这个Issues https://github.com/microsoft/playwright/issues/14250
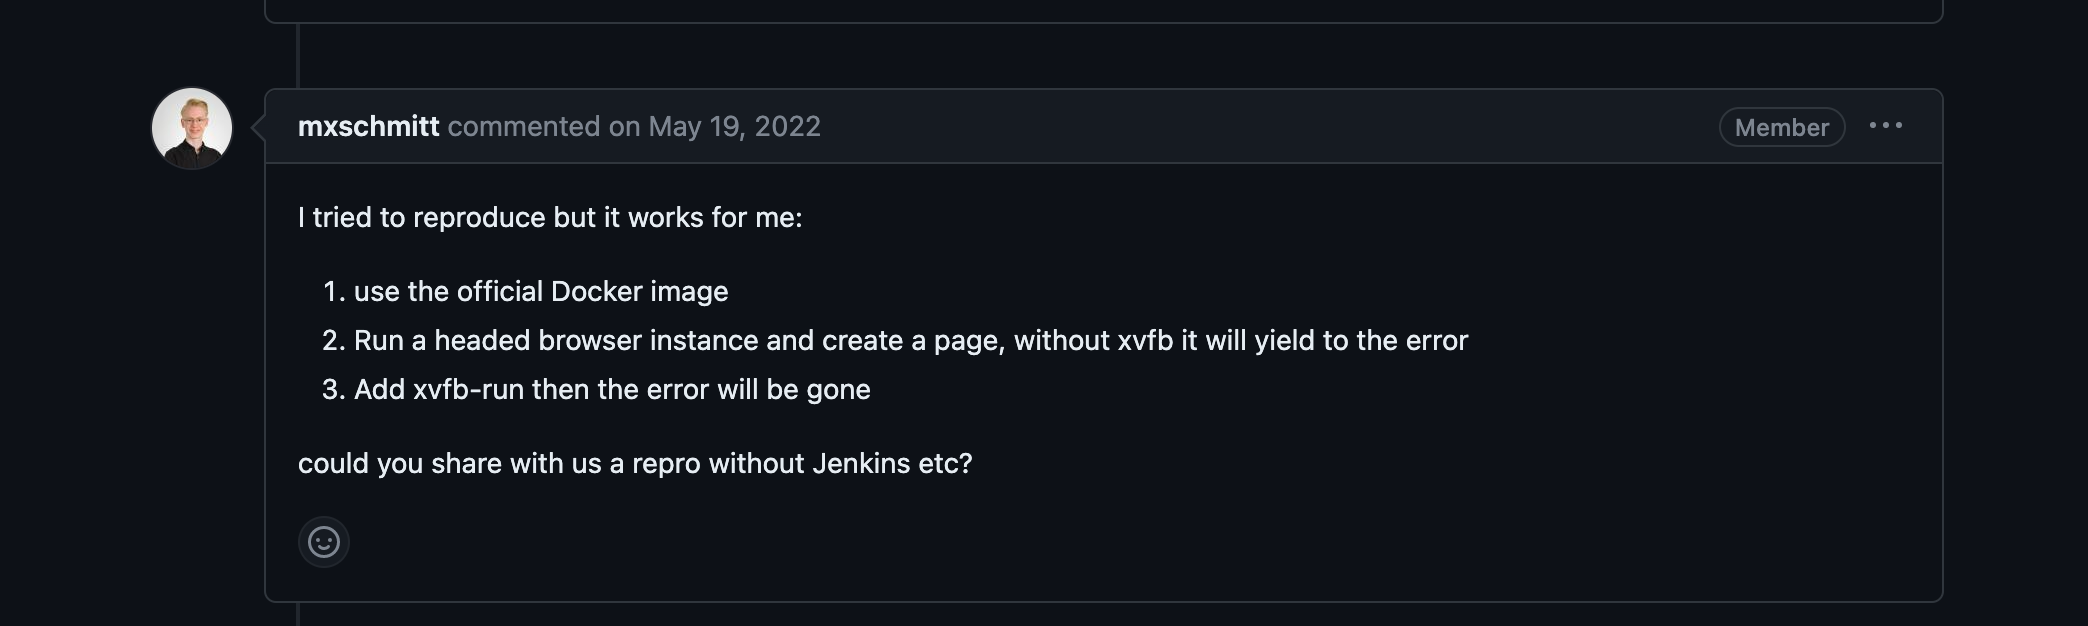
上面使用 xvfb 可以有效解决这个问题
很多小伙伴应该和我一样不知道xvfb是什么吧,没关系,我有chatgpt
¶安装
Centos
1 | yum install Xvfb |
Ubuntu
1 | apt-get update |
¶使用
1 | xvfb-run [执行语句] |
比如我们使用python 执行的文件名为main.py,使用 xvfb 执行命令如下:
1 | xvfb-run python main.py |
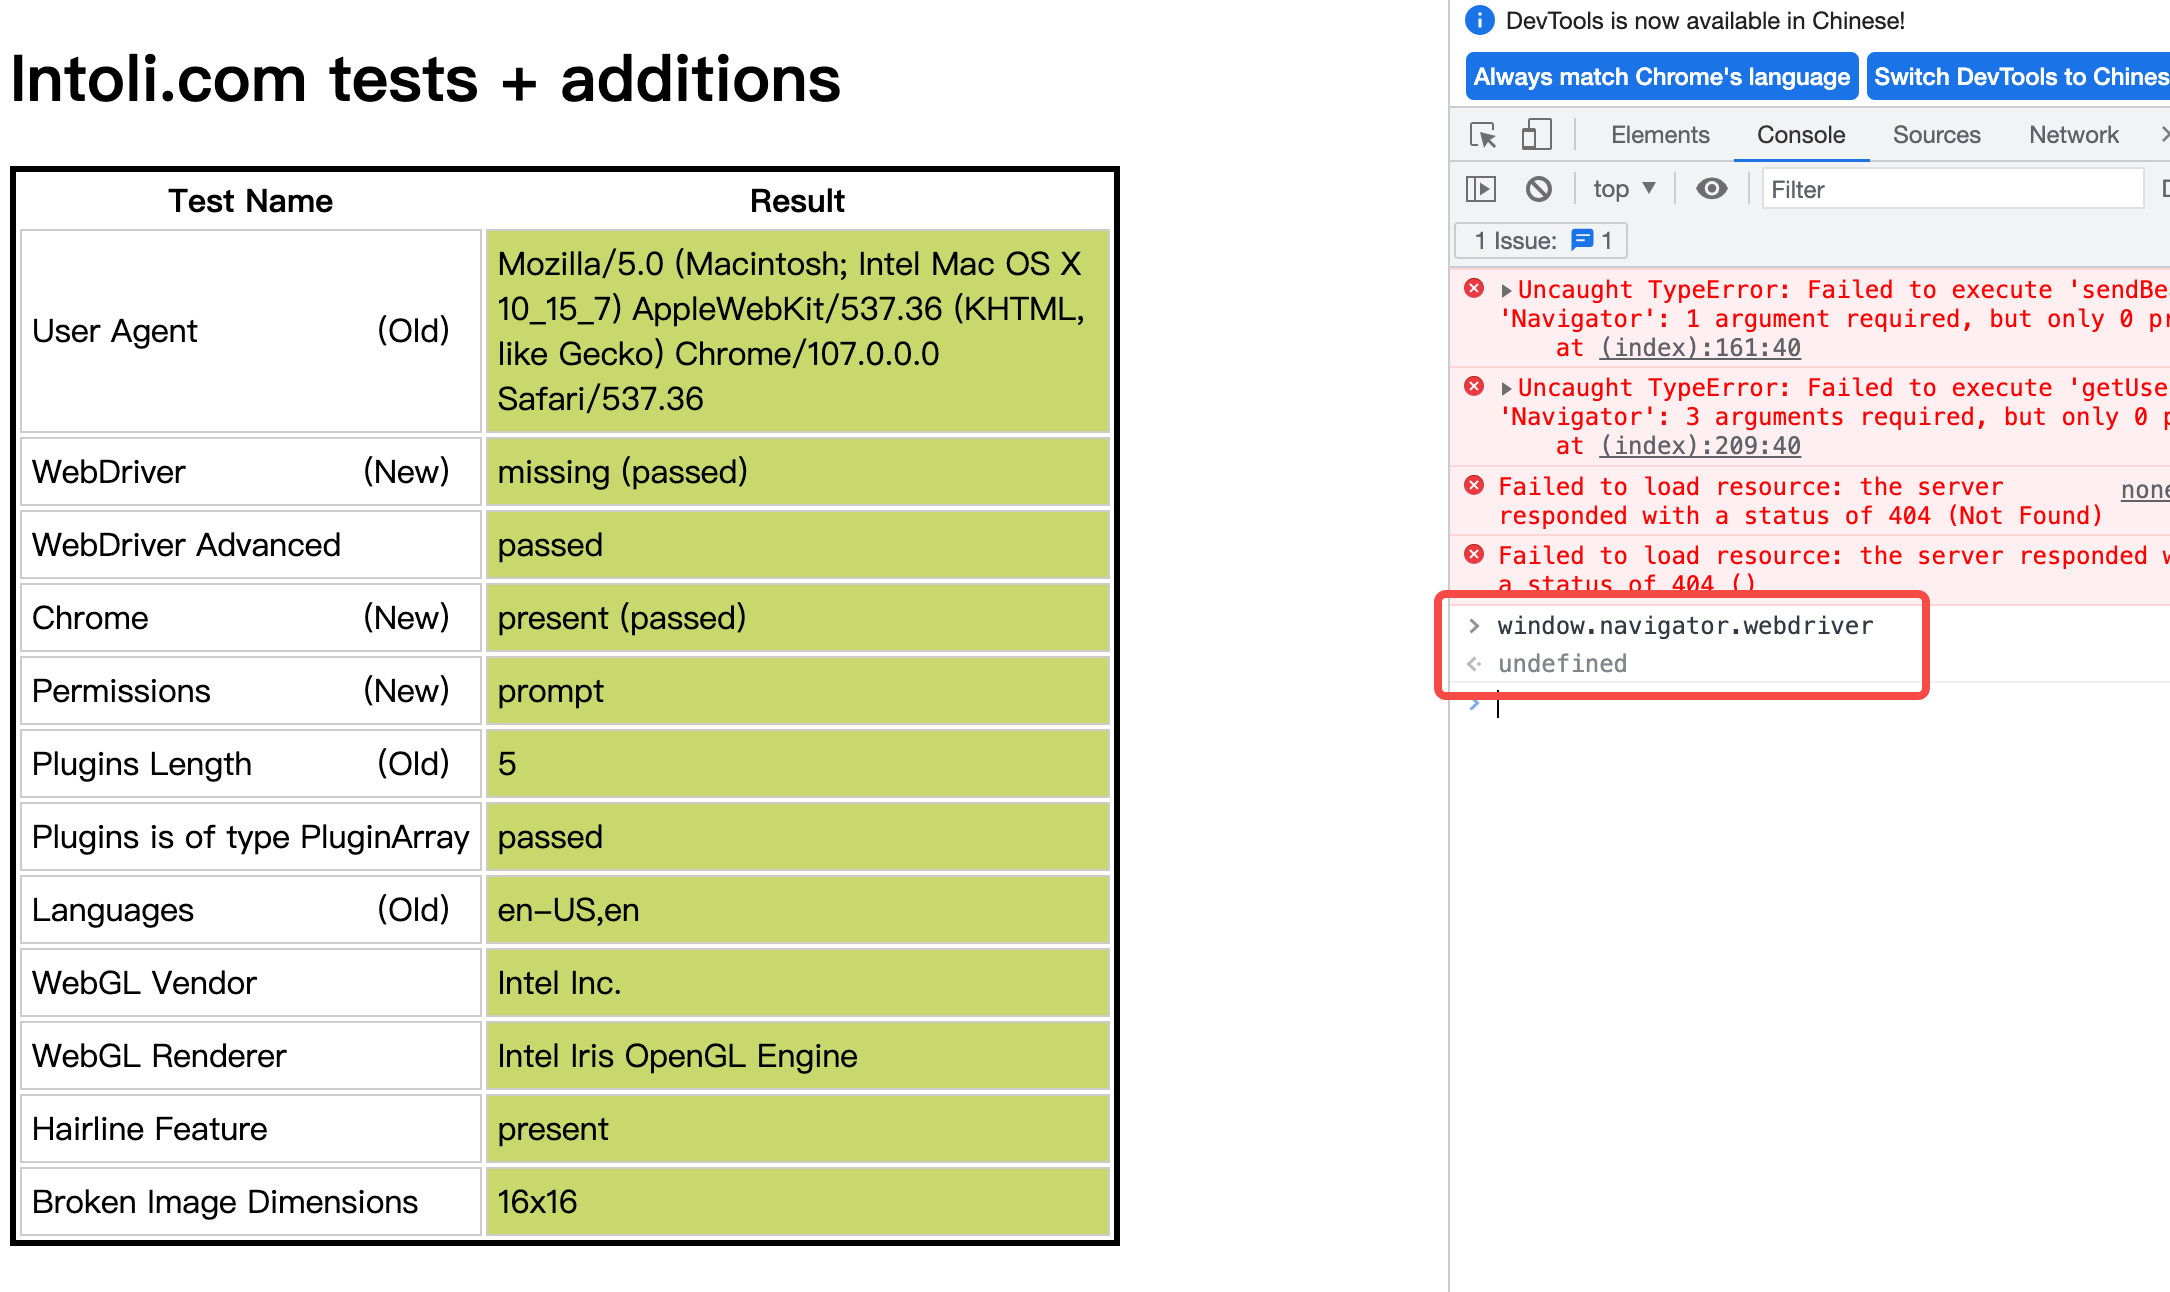
结果如下:
现在我们发现使用自动化工具和正常打开 WebDriver 设置的结果不一样,很多网站都是通过这个属性去判断是否在使用自动化测试工具,因此要如何才能逃避检测呢?
¶绕过反自动化/爬虫检测自动化
其实方法也很简单,就是通过在页面加载之前注入js脚本,抹去navigator.webdriver等浏览器自动化特征
主流的框架如 playwright, selenium ,Puppeteer都是支持js脚本注入功能的
以 playwright 为例
1 | js = """ |
在页面加载之前通过add_init_script 将webdriver 置空从而逃避反自动化/爬虫检测
其实,不只是webdriver,当自动化工具打开浏览器后,还会有很多其他特征码,如:
1 | webdriver |
有没有现成的脚本可以实现对这些特征的修改呢?当然有啦(感谢非常优秀的工程师乐于开源的精神,向他们学习,respect)
项目地址:https://github.com/berstend/puppeteer-extra/tree/master/packages/extract-stealth-evasions
作者是使用实现的案例是针对puppeteer的,但是js都是通用的,我们可以把它下载下来使用
地址:https://gitcdn.xyz/repo/berstend/puppeteer-extra/stealth-js/stealth.min.js
国内:
http://www.site-digger.com/uploads/stealth.min.js?continueFlag=67080a5e4fdfcd575cd2fed93d46a5ac
代码如下:
1 | with sync_playwright() as pw: |
现在是绿的了,真的很有效,无头模式下也是全绿的,泰裤辣,泰裤辣😄
¶Docker运行的playwright
注意:playwright官方只支持unbutu(所以使用debain也可以)
¶自定义镜像
我自己手写了一个Dockerfile,基于最新的python版本的基础镜像FROM python3.11,底层镜像是基于
debain系统,非常轻量,因此会存在缺少依赖的情况
如:
1 | [Error: |
没关系,都是小事😂
Dockerfile url: https://github.com/Darr-en1/awesome-docker-compose/blob/main/playwright/Dockerfile
¶官方镜像
https://mcr.microsoft.com/en-us/product/playwright/python/about
基础镜像没有安装playwright,需要手动安装,可能是考虑到大家对于版本的要求不一样
但是镜像内 webdriver 已经提前存在了,因此无需 playwright install
该镜像python 版本Python 3.10.6, 如果版本不合适则需要手动下载
经过测试发现官方镜像也是需要通过Xvfb才能使用有头模式的,白高兴一场,但还是非常值得使用
最后,fake-useragent 真的很好用,chromium 的适配性是最好的,但是webkit 是最快的
参考:
https://www.cnblogs.com/soymilk2019/p/17412596.html
https://zhuanlan.zhihu.com/p/78368287